How To Install Apache on Ubuntu?
Jump to navigation
Jump to search
| Source: | DataSource |
|---|---|
| Language: | English |
| Topic: | Ubuntu |
| SubTopic: | Apache |
| Last Edit By: | DochyJP |
| LastEdit: | 2021-04-14 |
| Document type: | User Guide |
| Status: | Active |
| Access: | free |
- First, log into your Ubuntu 20.04 system and update your system packages using the following apt command.
sudo apt update
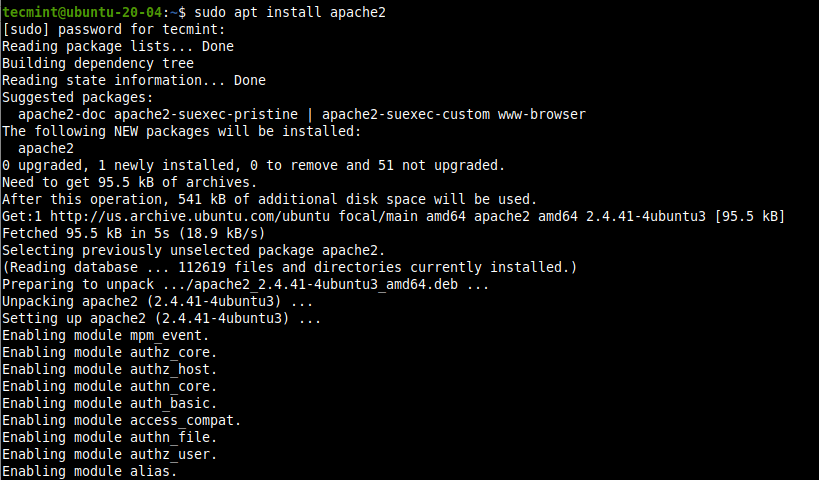
- Once the update process is complete, install the Apache2 web server software as follows.
sudo apt install apache2
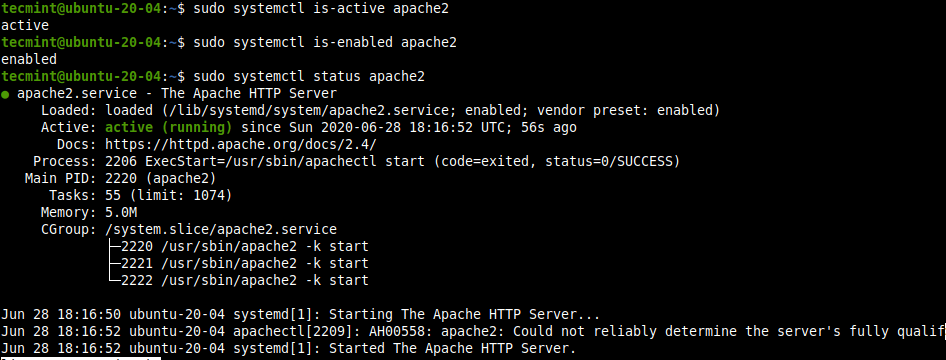
: - While installing the Apache2 package, the installer triggers systemd to automatically start and enable the apache2 service. You can verify that the apache2 service is active/running and is enabled to automatically start at system startup using the following systemctl commands.
sudo systemctl is-active apache2
sudo systemctl is-enabled apache2
sudo systemctl status apache2
: - Now that your apache web server is running, it’s time to learn some basic management commands to manage the apache process using the following systemctl commands.
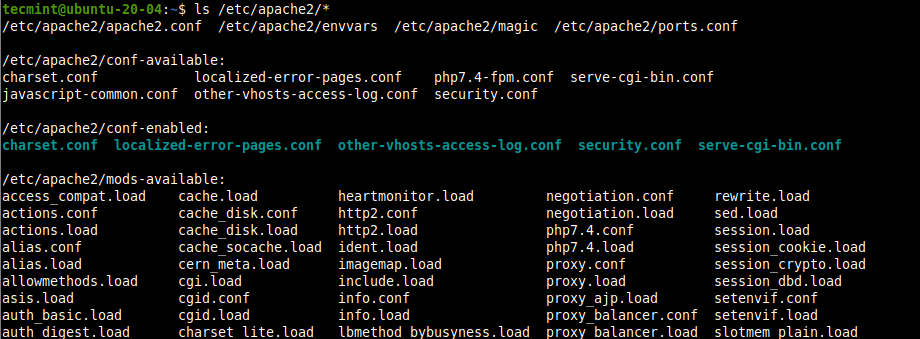
: - All Apache2 configuration files are stored in the /etc/apache2 directory, you can view all files and subdirectories under it with the following ls command.
ls /etc/apache2/*
: - The following are the key configuration files and sub-directories you should take note of: /etc/apache2/apache2.conf – The main Apache global configuration file, that includes all other configuration files.
/etc/apache2/conf-available – stores available configurations.
/etc/apache2/conf-enabled – contains enabled configurations.
/etc/apache2/mods-available – contains available modules.
/etc/apache2/mods-enabled – contains enabled modules.
/etc/apache2/sites-available – contains configuration file for available sites (virtual hosts).
/etc/apache2/sites-enabled – contains configuration file for enabled sites (virtual hosts).
Note that if the server’s FQDN is not set globally, you will get the following warning every time you check the apache2 service status or run a configuration test.apachectl[2996]: AH00558: apache2: Could not reliably determine the server's fully qualified domain name, using <your IP>.
Set the 'ServerName' directive globally in the main apache configuration file to suppress this message.: - To set the web server’s FQDN, use the ServerName directive in /etc/apache2/apache2.conf file, open it for editing using your favorite text editor.
sudo nano /etc/apache2/apache2.conf
and add the following line in the file (replacing webserver1.tecmint.com with your FQDN).ServerName webserver1.yourdomain.com
- After adding the server name in the apache configuration, check the configuration syntax for correctness, and restart the service using the command
sudo systemctl restart apache2
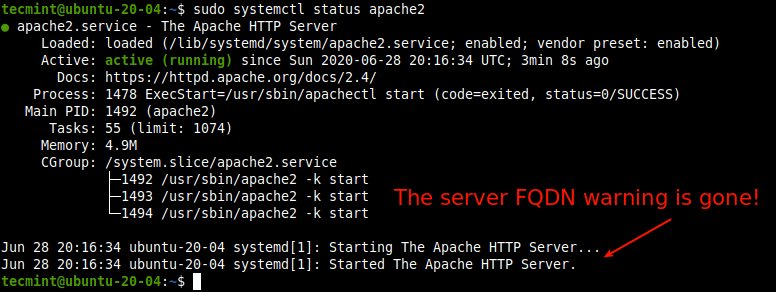
- Now when you check the apache2 service status, the warning should not appear.
: - If you have the UFW firewall enabled and running on your system, you need to open the HTTP (port 80) and HTTPS (port 443) services in the firewall configuration, to allow web traffic to the Apache2 web server via the firewall.
sudo ufw allow http
sudo ufw allow https
sudo ufw reload
ORsudo ufw allow 80/tcp
sudo ufw allow 443/tcp
sudo ufw reload
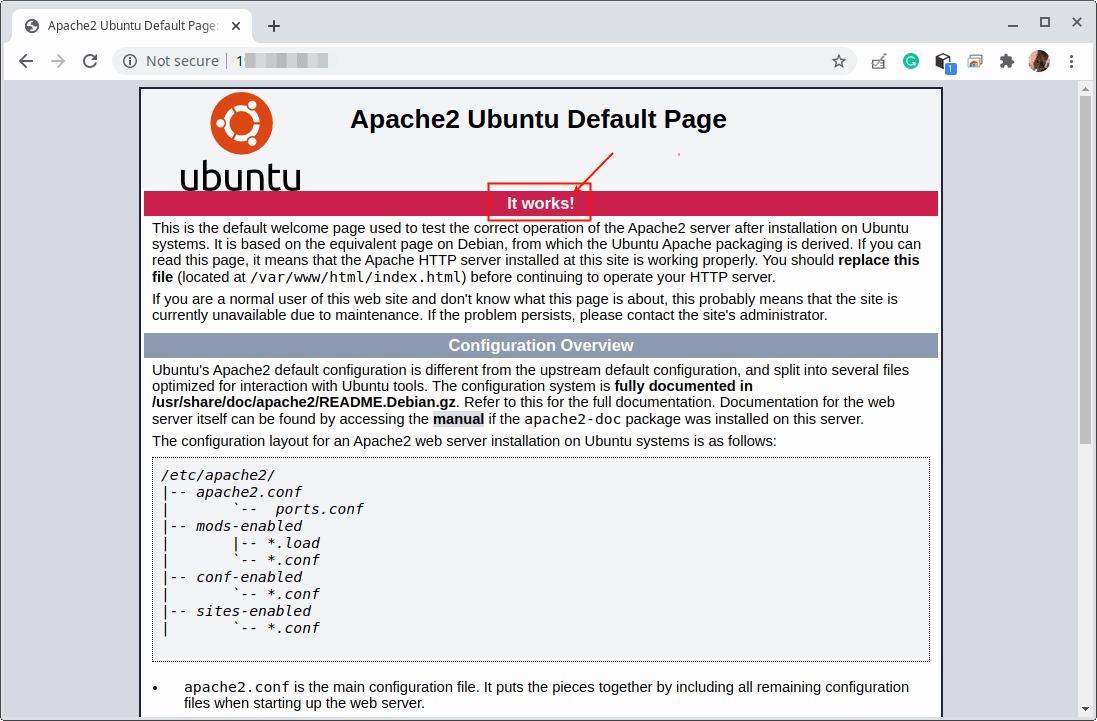
- To test if the Apache2 webserver installation is working fine, open a web browser, and use your server’s IP address to navigate. If you see the Apache Ubuntu default welcome web page, it means your web server installation is working fine.
: - To find out your server’s public IP address, use any of the following curl command
curl ifconfig.co
- Setting Up Virtual Hosts in Ubuntu 20.04
Although the Apache2 web server is configured by default to host one website, you can use it to host multiple web sites/applications using the concept of “Virtual Host”.
Therefore Virtual Host is a term that refers to the practice of running more than one web site/application (such as example.com and example1.com) on a single server.
Additionally, Virtual Hosts can be “name-based “(meaning that you have multiple domain/hostnames running on a single IP address), or “IP-based” (meaning that you have a different IP address for every web site).
Note that the default virtual host which serves the Apache Ubuntu default welcome web page which is used to test the Apache2 installation is located in the /var/www/html directory.
- For this guide, we will create a virtual host for the web site called linuxdesktop.info. So let’s first create the web document root for the site which will store the site’s web files.
sudo mkdir -p /var/www/html/linuxdesktop.info
- Next, set the appropriate ownership and permissions on the created directory.
sudo chown www-data:www-data -R /var/www/html/linuxdesktop.info
sudo chmod 775 -R /var/www/html/linuxdesktop.info
- Now create a sample index page for testing purposes.
sudo nano /var/www/html/linuxdesktop.info/index.html
with the following html :
:
Save the file and exit it. - Next, you need to create a virtual host configuration file (which should end with the .conf extension) for the new site under the /etc/apache2/sites-available directory.
sudo nano /etc/apache2/sites-available/linuxdesktop.info.conf
<VirtualHost *:80>
ServerName www.linuxdesktop.info
ServerAlias linuxdesktop.info
DocumentRoot /var/www/html/linuxdesktop.info
ErrorLog /var/log/apache2/linuxdesktop.info_error.log
CustomLog /var/log/apache2/linuxdesktop.info_access.log combined
</VirtualHost>
Save the file and exit it. - Next, enable the new site and reload the Apache2 configuration to apply the new changes as follows.
sudo a2ensite linuxdesktop.info.conf
and relaunch Apache2sudo systemctl reload apache2
- Finally, test if the new virtual host configuration is working fine. In a web browser, use your FQDN to navigate.
http://domain-name
If you can see the index page for your new website, it means the virtual host is working fine.
:
- For this guide, we will create a virtual host for the web site called linuxdesktop.info. So let’s first create the web document root for the site which will store the site’s web files.
That’s all! In this guide, we have shown how to install the Apache webserver on Ubuntu 20.04. We also covered how to manage the Apache2 services, open the HTTP and HTTPS services/ports in the UFW firewall, tested the Apache2 installation, and configured and tested a Virtual Host environment.
